43221 Queen Elizabeth Sixth Form College

43221 Queen Elizabeth Sixth Form College

Monday, 14 March 2011

Production Monitoring

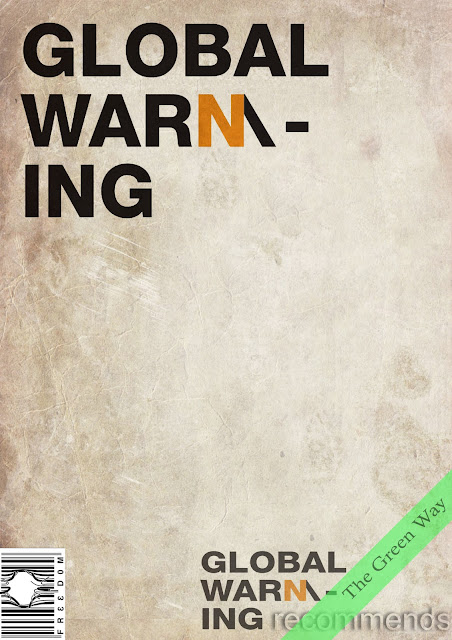
Front Cover Inspiration 


Progress 


14th March 2011


this is an initial draft of my double page spread, we had been asked to look at existing double page spreads in magazines that attract a similar target audience to our own and investigate how they use the layout to maintain interest from reader, the above photo graph demonstrates a rough idea of how my design for my double page could look like. 


21st March 2011

Progress:
Since last week’s photo shoot on Friday I have begun to edit my images via the post production stage, I am editing my photos using Photoshop CS4 at home and at college to allow me to achieve professional standard images, to ensure I am achieving a professional standard I am ensuring that I am following tutorials and guidance from online sources and I have multiple copies of my work to ensure I have the chance to make changes at any stage of my editing process.

At the actual photoshoot on Friday 18th March I spend around 45 minutes trying to get the shot I wanted for my front cover, after several different poses and rearrangements of lighting setups along with over 50 photographs I felt I had the one image I needed, once I had shot the front cover image I then decided to photograph the prop individually to use at some point further within my magazine on the double page spread, after this I then transferred the images from the SD card onto my memory stick and student account on the college network to ensure I had two safe legitimate copies of my work.

Overall I had no real problems or issues at the photoshoot with neither the model or any props involved, everything seemed to run seamlessly with exception to the time restrictions, the only real issue we had was the time and this was against us from the start as we had only a 45 minute slot to successfully shot my front cover, this meant that we were unable to change the outfit that the model was wearing as frequently as we would have liked, I feel with more time on location (in studio) i could have achieved a more successful image as I would have more variation in the images i have because if more time was available to me I feel I would have introduced other props and clothing so in the editing stage I was more confident that I have multiple images that i could select from rather than 1 or 2 that I thought would be to the standard I required.

1st April 2011
Progress:


As of today my project is starting to take shape, since my initial editing on the 21st March 2011 I have almost completed my front cover design and only have simple additions to make for example to add some strap lines, the front cover is coming along nicely and by the end of today will be completed therefore allowing me time to develop my article/double page spread.
I have edited my props and model for my front cover in separate documents and once completed I will copy the layers I have effectively created into one file to lay on top of the background I have made following an online tutorial.
Although I am pleased with the current product I have had some issues along the way to development, the biggest problem I have had and possibly could have had was to lose all my data, my memory stick contained all my media project work and as of Wednesday I have lost all content due to the files becoming corrupted as the pen drive snapped within the computer, I have decided to send my broken pen drive away to be fixed however this occurrence has hindered my project development as all initial ideas, layout designs, and images from the day of shooting have been lost,  the lack of organisation or the issue for no contingency for this has meant that I will have to wait a week before my actual front cover shoot will be processed onto the Photoshop file I am currently working on, in the mean time I am booking myself in for another shoot as I understand that the data may not be retrieved.
Below is  a screenshot of the front cover as it currently stands at 11:30 this morning, I am planning on further developing the design as I understand that the lack of headings  and no focal image make the product incomplete.
For this screenshot I have included the layers panel so that you are able to see the use of independent layers used to generate this front cover, in addition I have also rasterized the layers so that it is clearer for you to see what layers have particular fonts or fill boxes on and be able to associate these with what is included on the cover.


20th April 2011 


since the last progress entry i have further developed my front cover and double page spread, below are the two finished examples of work.


what  has been done on my front cover here for my model  is that i have effectively used the raw file editor within Photoshop and have made the “blacks” in the photo almost to fill the image, the original image I started working on was well lit and so the black adjustments were necessary to create this image to this and the allow me to produce this image I firstly opened a separate Photoshop document, after this I then changed the levels of blacks so that the background turned a dark grey whilst the model turned fully black, after confirming these changes I then put the image into the invert mode so that I could determine the dark colours from the slightly lighter greys, after this I added a new blank layer with checkerboard affect and unlocked the background layer, then I began to erase the model form the scene using the erase tool and once the image was of the model only I dragged the layer onto the backdrop of the original file and positioned her around the sub titles and headings, the final adjustment I made to this layer was to rotate the image horizontally so that the model was facing the opposite direction 


see more information in unit 3 evaluation !


Monday, 7 March 2011

Shutter Speeds

The Shutter Speed controls the amount of light being let into or through the lens to get to the senor or film, the shutter speed can be altered via two settings on a camera, fully manual mode and via the shutter priority mode.
In basic terms a picture is constructed using 3 key components, the shutter speed, the aperture and the ISO. These 3 combine to make the image what it is and can have dramatic effects on a image when a user understands it functions, the shutter speed as we now know controls how much light comes onto the senor during a specific duration however the aperture or F stop can also control the contrast of an image as by using F3.5 or lower the camera allows as much light as possible into the camera body within the time period that the shutter speed is set to, having a low F stop means that the maximum amount of light can be let in, if a image is taken in dark conditions and the user of the camera wants to manually select a high or fast shutter speed for example 1/125 (125th of a second) the F stop will be lowered to around 3.5 or lower, the problem with this is that F3.5 allows a limited amount of depth of field meaning that only a section of a subject may be well in focus whilst the rest appears out of focus, a way to adapt this would be to alter the ISO settings, in dark conditions the ISO can be altered to allow more light onto the sensor and therefore allows the subject to be lit better, this MAY allow the user to have a higher F stop depending on conditions for example if it is lit well enough to shoot F8 and get a well exposed image it would benefit the photographer as they would be able to get a better depth of field, there are however drawbacks to shooting with high ISO’s and we shall look at this in the ISO explanation below.
The shutter speed when manually set can be used in two key and visually obvious way, using a slow shutter speed blur’s any action, whilst using a fast shutter speed enables the picture to freeze the subject and its action, using the technique of a slow shutter speed is used when photographing landscapes or mainly still subjects, using a slow shutter speed for example 20 or 30 seconds means that the F stop can be pushed to its max for example f22 or f29 enabling the camera to produce a photo with everything in focus, this technique can also be used for another effect for example to blur a subject, if a photograph was to be taken of a sports can where there is frequent movement a long shutter speed may be out of favour by many however if the speed is correct the image produced can have a great effect.
Below are 3 examples of long shutter speeds to demonstrate different uses of the technique the first shows a perfectly in focus landscape where a long shutter speed combined with a high aperture has allowed for a great depth of field, the second image shows a usage of a long shutter speed in a sports event and this image showcases a difficult but effective usage of a longer shutter speed, and the third image shows the effect of a slow shutter speed on a moving subject to create a mysterious effect that isn’t seen by the human eye.


Below are 2 further examples of shutter speeds however this time these examples show the use of catching a moment by freezing a subject using a fast shutter speed for example 1/400 (400th of one second) fast shutter speeds are used mainly in sports events where the action needs to be captured as a striker in football celebrates or is about to shoot which could possibly result in a goal.


examples of my slow / fast shutter speeds

fast


fast


Slow


Slow


ISO Settings


The ISO speed affects the shutter speed / aperture combinations that you use to obtain correct exposure.
a digital camera's light meter warns you there is not enough light to correctly expose a scene, the options are to  use the on camera flash, slow the shutter down or have a higher ISO. if the ISO is increased sensitivity allows you to obtain a correctly exposed picture, However all this increase in sensitivity does not come without drawbacks, your image will appear more digitally noisy and so is less likely to be able to be printed to a large size format.


below are 3 examples of different ISO settings to show how low, medium and high settings can affect a image dramatically.


on the first image the ISO value is 200 and you can see limited amounts of content within the scene, below on the second image the ISO value is 800 and you can begin to see more background content, and finally on the 3rd image you can see as the value of ISO is 1,600 we can see a wall in the distance however it appears very noisy and if enlarged would make for a poor quality print.


Friday, 11 February 2011

Side / Front Lighting

Side and front lighting is where the light falls on a particular part of the subject. 


Side Lighting is where light falls onto a subject from the side in relation to the camera's positioning.

Front Lighting is where light shines onto the side of the subject facing directly towards the camera.

Side lighting can connotate darkness in the photo as light is only falling on one side of the subject, Side lighting is good for photographing males as it accents the jawline.

Front lighting - Depending on where the light comes from produces different effects, if the light comes from above it produces what is known as "butterfly lighting" this is because it makes a shape that is very similar to a butterfly under the nose Front Lighting can also be called Glamor lighting as it is often used when photographing female models etc, Front lighting is usually used to photograph females as it highlights the more feminine features it also softens the jawline and the check bones.


Thursday, 27 January 2011

Aperture Settings


Canon EOS 450d, aperture priority f4, ISO 200, Shutter Speed Auto

The series of these three images show how the depth of field can effect an image to create a alternative impression and message on the viewer, with the above example I have set the camera to aperture priority and have decided to use the lowest stop being F4 in the environment the camera was in, the camera before taking this picture then calculated the shutter speed after I had manually selected the IOS to 200, using f4.0 allows the main subject in the image to be in focus whilst the background appears to be a blur.


Canon EOS 450d, aperture priority f14, ISO 200, Shutter Speed Auto

This second image represents the importance of time and speed being combined, this image is shot at f14 and shows a greater depth of field in comparison to the previous shot as we can see more detail in the background without losing any foreground focus. In this shot we are able to see more detail towards the far end of the table and we can now make out the display creating the backdrop in this shot, although we cannot necessarily read what the display says we are however more aware of what the background is as we can see that it is examples of work , also with this aperture and shutter combined we are able to see the figure’s of fellow students working at computers around the room and we are able to see what body shape they have unlike on the previous image where we could only see a blur of their clothing for example a pink blur.


Canon EOS 450d, aperture priority f29, ISO 200, Shutter Speed Auto

For this final example of aperture setting I have put the camera to its limits by shooting with F29, this is the camera’s maximum capability and with this setting we are able to achieve the maximum quality of depth of field, with this setting everything is in focus that isn’t moving for the duration of this shot, with such a high F stop it is likely that in most environments the shutter speed will be pushed to at least 1 second  and therefore if something is to move within the frame for example a bird or human they will become blurred therefore meaning that the shot doesn’t fulfil its full potential. The above image demotrates these settings however after reviewing this shot although the background and foreground is well focused it has a slight motion blur in the middle, Mark (teacher) is stood between the main subject and its backdrop and it appears that his arm has moved over the time period that the shutter is open/active meaning that there is a blurring effect of his right arm/hand. Shots that use high F stops for example F29 and long shutter speeds such as 20 seconds are often used by photographers looking for a perfectly focused image or one that can represent movement, an example of a photographer that adapts these techniques into his images is local photographer Joe Cornish, two examples of Joe’s images are located below and demonstrate the effect movement can have on a long exposure and also how with no movement the perfect landscape image can be achieved.


Tunnel Beach, Dunedin, dusk

This shot shows the water looking misty and has a mysterious effect, the shot will have been created using these techniques of a high F stop low ISO and long shutter speed to avoid freezing the action of a water ripple or wave.


Summer evening above SwainbyThis shot again is achieved with similar settings and Joe has used this technique to allow him to get maximum focus on the whole of the landscape making the image more appealing and 3 dimensional.


Tuesday, 18 January 2011

Own Photography


Nikon D70s, Fully Manual, f 5, ISO 800, Shutter 1/250
Pop Up Flash -1.0 Intensity
Post Production Photoshop CS4
Location Redcar Skate park
This shot shows a controlled use of both high shutter speeds and good framing, I have taken this shot during a visit to a local skate park, for this shot I positioned myself on top of one of the several jumps and have a wide angle lens on to ensure that I capture the environment as well as the BMX and rider, I have chosen to include the graffiti in the background as I feel this adds to the shot, it allows the viewer to get a sense of the environment and adds another dimension to the image, the post production involved within further developing this image included adapting a pre set gradient to alter the colour and effect, I have used the preset gradient of black fading out to what already exists in the image, I have adapted this gradient by changing the gradient colour from black to green as it emphasises the graffiti and again makes the image more visually appealing in comparison to its original dull grey high contrast colour. Another alteration I have made in Photoshop was to select the magic lasso tool and select the body and bike to enable me to control the brightness, contrast, hue and saturation meaning that I was able to make the rider and his bike look like it is coming towards the viewer adding to the depth we can already see via the backdrop being so bright and alarming. By selecting the rider I was able to create the effect I was looking for which was to brighten the main subject here by using a combination of the above 4 adjustments i could alter when working on this individual piece.


the above image has been constructed using the pre and post production stages of photography, after deciding what i wanted to photograph i then began to plan how and where to take the image, after getting the intended result of a broken heart formed by sparklers i then began to with take the post production stages, firstly i created a duplicate layer and developed my own personalised gradient, after doing so i create the overlay affect so that the white to blue would fall across or on top of the image to create the subsequent above image, see below images to understand how to develop a personaisied gradient and what to overlay it onto the intended image / subject.


the above image has been achieved by using some easy and quick post production phases to help create the purple gradient effect, check the tutorial video i have created below to watch how a similar picture has been edited very quickly in a similar way, for this image i had positioned a flower in a vase and had left it in a well lit rom for several days, after monitoring the flower on a daily basis i kept track of its progress of life and waited for the point in which it could not grow any more, the shot was taken in dark conditions with a long exposure and high f stop, this was done so that i was able to get a great depth of field so that the  cracks could be  seen within the flowers stem, after taking this shot i did some quick editing to make this image more appealing and unique before uploading and sharing this sample of my work. 


this image above is another example of the use of a long exposure and the effectiveness it can have to create an extraordinary outcome, the image is of a flashing very small led light however over the duration of a 5 second exposure by walking towards the camera you are able to create some very cool and unique effects, i like this image as although it was unintentionally done the person holding the light has made a circular movement generating a cool effect, with further post production editing i feel this image could be improved by placing someones head in the distance within the small hole, the image looks 3d and this appeals to me as it is an example of a currently incomplete piece of work yet effective at getting people to have a second glance.


the above image is an example of my highest speed photography in practice, after watching some high shutter speed videos i felt ready to create my own series of images an the above example is one of a series of 7 images showing the water falling from a tap, the image i feel is a good representation of what high speed photography should document as the focal point is in focus whilst the mid and backgrounds appears to be one big blur. For this image I have used the manual focus function on my camera, the reason for this is because without the manual focus the main subject in this image, the water droplets would not be in focus and the background would be what the camera chooses to focus on, the reason for this is because the camera is only able to see the background when focusing as this is the only constant subject in the image as the water droplets were falling at a faster pace than the camera was able to recognize them, using the manual focus mode for this and the other water images on my blog has allowed me to focus on the independent droplets as appose to the background by placing a object for example a pen to focus on the area that the water will drop.


with this particular image or example i have tried to use the motion blur affect both during the shoot and via the post production, i have shot the image myself holding one hand out in front of the lens, whilst moving my hand in a fast movement towards the right i have tried to keep up with this by moving the camera at the same pace, you can see that my hand, watch and the product is in focus whilst the background can not be recognised by most viewers, because i have shot the image at around 60th of one second it has given me time to move my hand however still keep the camera handheld without gaining any upwards or downwards movements that could have ruined the image, the effect is easy to create is photoshop however for this particular example i mainly used the image straight from the camera to show how easy it is to create such easy yet intriguing effects.


above are tow shots from my experimentation of fast shutter speeds, after seeing similar photos to this on the web i decided to develop my own, for this shot i had my camera on a tripod and positioned a large bowl on top of a blue piece of card, the images shown above are good example of fast shutter speed shots as they capture the splash and crowing of the water very well, no advanced post production was necessary however i did crop elements of the photo out make it seem as if the experiment wasn't conducted in my kitchen.


this is another example of faster shutter speeds combined with a low F stop number for this i used f 3.5 at around 500th of a second, i choose not to use a faster shutter as i wished to achieve what we can see above the explosion beginning to fall back down, instead of capturing the little lines i chose to use the settings to capture an image that has used a fast shutter but not so fast that you can not understand the movement that was involved if you were present, in addition the shutter speed was also at 500th as i needed the correct amount of light to get the appropriate exposure and didn't want to use a on camera flash or puss the ISO so high that digital noise would appear.


i have chosen to include the above two images on my blog as it demonstrates my inspiration for new ideas and perspectives for photographs, these two images show uniqueness and appeal to me as i haven't seen them done before, the first image if of fortnum and mason in london and shows the spiral staircase as a if it were a snails shell or other circular object, the second image is of two cars behind the one i am a passenger within this image also appears to me as within the mirror reflection the cars are perfectly still and in focus meanwhile the content away from the mirror appears blurred and so suggest or highest the important of my friends behind in their cars.


this is an example of the rembrandt lighting affect, this lighting affect is very popular and so i decided to attempt to produce my own image using the recommended settings from my photography teacher, i have chosen to light the near side of the face and have positioned the model towards the right hand side to suggest that he is trapped and he only has darkness ahead of him, i have however chosen to light my subjects clothing as i feel it shows their personality and approach to life in a meaningful way.


this is another example of high speed photography, i have used my Nikon D70s and have used the full manual mode to allow me to get the intended exposure whilst freezing the action, i have chosen to use F3.5 to allow as much light as possible onto the sensor and also to allow me to shoot at the fastest possible frame rate, the shutter speed was set to around 800th of a second and so frozen the sand, ball and golfers position to all for a action shot, the shot shows good framing and highlights the importance of fast shutter speeds .


Photoshop CS4 Tutorials


in this section of my blog are a number of photoshop tutorials i have followed to create some cool effects for images and even some backgrounds that i have made from scratch 


http://www.youtube.com/watch?v=WrPS7JcSKzc


below are the two results i got from following this tutorial from the above link, i have followed the tutorial for the majority of the time but have also added some personal adjustments.


http://designertoday.com/Tutorials/Photoshop/6178/Ray.of.Light.Photoshop.CS4.Tutorial.aspx

this link will take you to a written tutorial showing how to create a ray of light in your images, my example has been posted below and  i have followed this guide completely to create a similar effect for my image.


http://blogs.oreilly.com/missingmanuals/blog/2008/12/five_fast_photo_effects_in_pho.html

the above tutorial demonstrates how to quickly replace a background in an image, my subsequent finished product is shown below.


Wednesday, 29 September 2010

Introduction Project


In this project I have effectively used the subsequent techniques, Text Control, Layers, Filters and the Crop tool. All of these tools I have used to a basic level as I am unsure of how to use them to their full potential as I have had restricted time using Photoshop.

The work I have completed at this stage shows development in these skills as I have only used them to a very basic level if I have even used the techniques before prior to this project, for example in the past I haven’t used a text control or layers tool however whilst developing my product I believe I have used the tools effectively for a first attempt, in review of my finished product it can be seen that I have used both tools effectively as the layers tool has been used to allow the pigs face to be the key focus point on this poster along with the spam tin and spam within the burger, I have used the layers tool to bring the attention to the pig at a first glance to draw the viewer in, and I have also used this tool on the spam itself and then tin, I have highlighted the spam and the tin as this is the item of interest and the pig has been used for a initial hook to keep the viewers involved with the product so that they will continue to analyse the poster until ultimately they see what product is being advertised.

The weaknesses I feel that I have after a second look at this product is that the overall product doesn’t look very professional, the reason being for this is that I haven’t used Photoshop before meaning the product lacked good editing skills also in addition to this the photographs taken were not mine and therefore I couldn’t get my thoughts into the final product, if I was to have control of the camera I personally would have taken the image so that more of the settings or surroundings could be seen to allow the viewer to get a feel of the location, furthermore I would have also zoomed further in to cut away the side of the model so that the model was to the left side and more of the setting was offset to the right, I would have personally used this technique to take away the body of the model and I would have also set the image up like this because of the way people read photographs (left to right) this would mean that immediately people would see the focus point and message of the advertised product.

To move towards the standard achieved by professional print photographers I feels that before performing media products such as this I need to have greater understanding of the product its functions and target audience, and I also could have reviewed other products similar to this to see how they are advertised and set out.

Prior to the rebranding of this product SPAM, the target audience was mainly older parents, or people who work a busy lifestyle on the move who don’t have time to prepare big meals.

Since my rebranding of the product I feel that the target audience has significantly changes I now believe that the target audience is from 16-19 year olds from the socioeconomic group of A,B, and C1. Without changing the actual product we have successfully managed to change the focus group from older busy people to the younger market, this has been done via a number of advertising techniques alone that make the product more appealing to the new target audience, the element in which we used to engage our audience is mainly focused upon the pig. Because in this shoot we haven’t used a real pig, the mask created provides a more humorous aspect attracting the younger audience as this technique engages this target audience to “read on”.

To develop the product I feel would use the camera more affectively and as mentioned frame the picture in a different way to allow more a less obvious shoot of a person with a mask, I could achieve this by completely taking away the left side of the body as we look at the image and by doing this would allow for more room for setting on the right. Also I feel I could use Photoshop to create a improved and more professional looking advertising poster.

When creating this advertising campaign we were unaware of all the contributing factors about our target audience if we had known all aspects of interest we would then be able to create a more comprehensive product that would tailor the needs of the targeted audience, If I was to create another campaign similar to this next time I will be able to meet their needs easier as I would known specific bits of information and would create time to find addition information about the target group. This demonstrates my understanding of segmentation systems as I have adapted the product to tailor the requirements of the target audience; one significant change our group brought to the restructure of the advert was to bring a more humorous aspect to the product so that it appeals to a younger audience and therefore fits the requirements of the task.